Loading Incident Data- Access
Before you load incident data you will need to create an Access database containing the Workload Modeller Add-in table structure.
Create a new Access Database
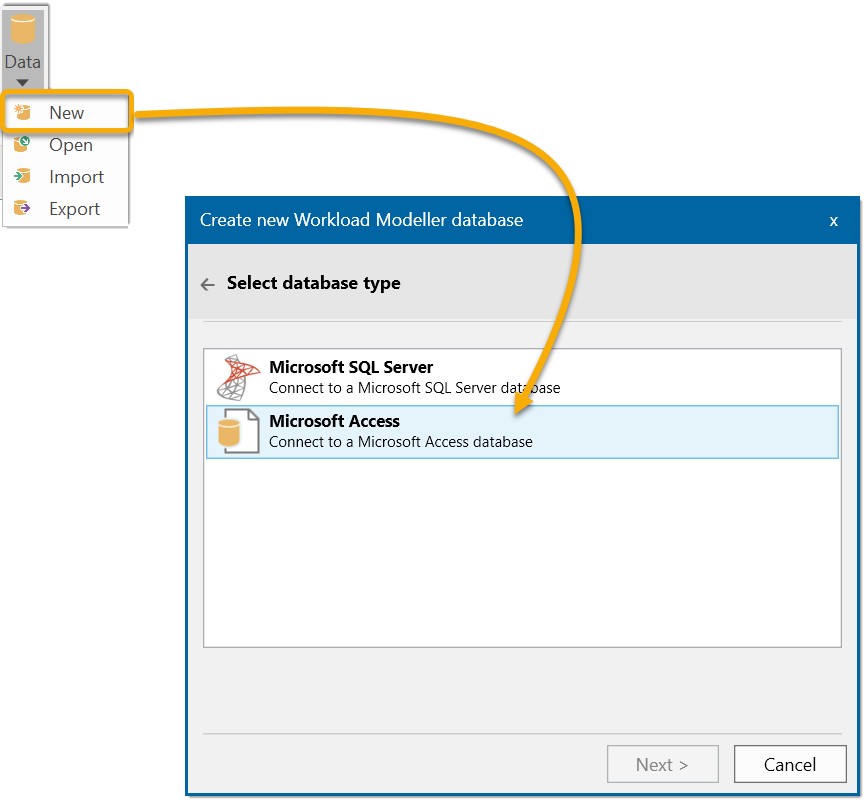
Click Data > New and select Microsoft Access. Click Next.
Note: Remember however you do not create a new database but simply a copy of DatabaseTemplate.mdb.This is a template database that is shipped with Workload Modeller and is available inside the installation folder. C:\Program Files\Cadcorp SIS Desktop 9\Addins\Workload Modeller (x64)
Click the Browse button  to specify a location for the Acess database to be created. You can also use the Workload Modeller sample Access file as a template.
 ![]() Related Topics
Related Topics
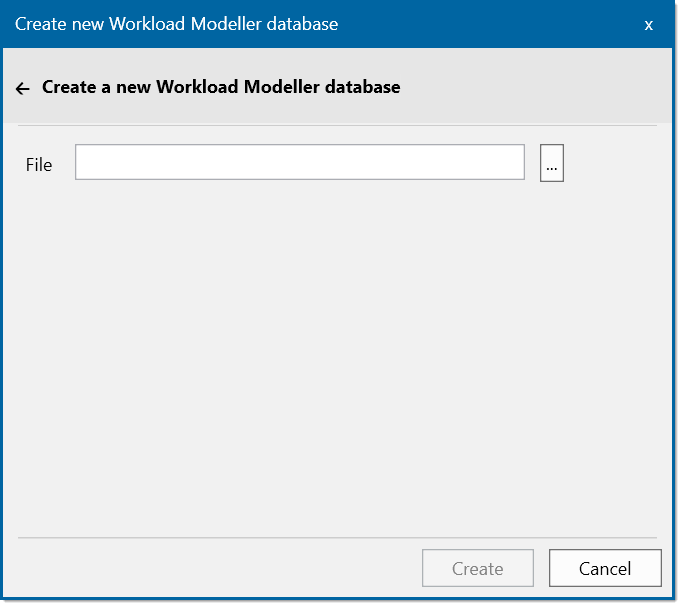
Click Create.

Open another Access Database
To open a different database, click Data > Open: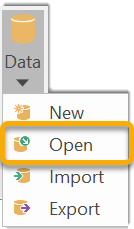
Data Open allows the user to swap to a different Workload Modeller database. Simply browse to find your required mdb file of interest.
Import Incident Data
Next begin loading incident data and callouts into the database. Click Data > Importto open the newly created Access Database. 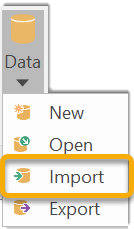
Navigate to and select the required Access database.
Now use the Data > Import option to open the Load incident data dialog:
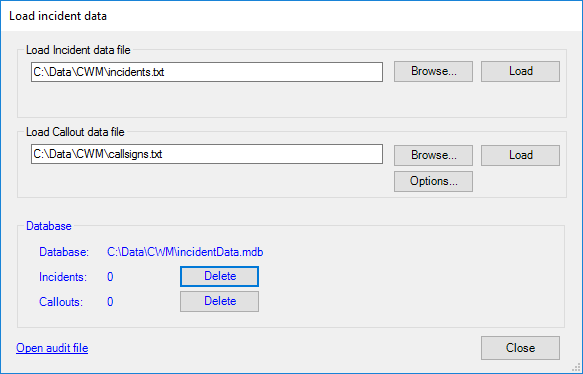
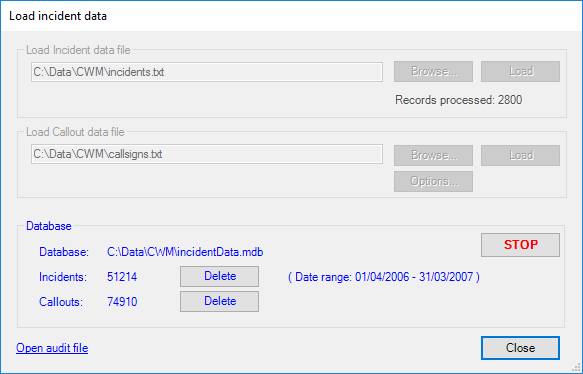
The current database is seen in blue at the bottom of the dialog.
Use the Browse buttons to locate the incidents.txt and callsigns.txt data files; click Load to read the data into the database.
Use the STOP button to stop the load process at any point.
A note about Callout Options
The Assigned, Mobilised, In-attendance and Released fields are mandatory for each call out. But you may occasionally encounter missing data. To streamline this, the data loader can substitute default values.
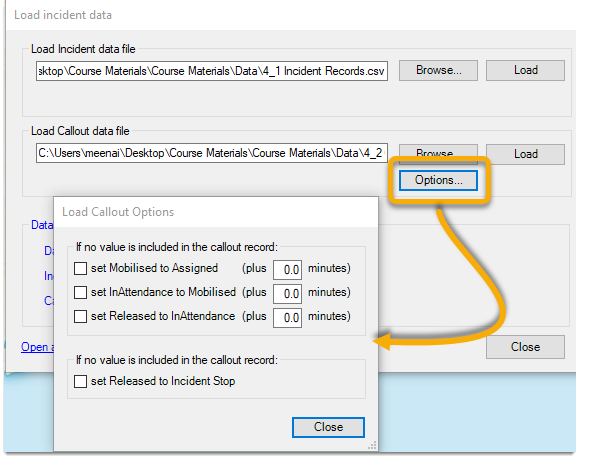
If you have also enabled Set Released to Incident Stop, remember:
-
Loading time will be slower
-
Incidents need to be loaded first
-
This option should not be combined with Set Released to InAttendance + N min
Incidents and Callsigns data files in either .txt or .csv format can be loaded into the database. The format to be read is defined in the Settings.txt file located in the Workload Modeller installation folder.
Set the following line to txt or csv as required.
DataFileExtension = txt
Use the Delete buttons to delete data in the relevant database tables, i.e. delete incidents.txt or callsigns.txt incident-related records.
TIP: The Load incident data dialog can be opened at any time to determine the name of the current database and how many records have been loaded.
Export Incident Data
To export historical data or turnout model results to Excel click Data > Export: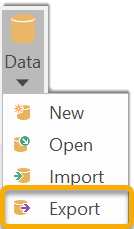
The Export dialog will be displayed:

Select the required Table from the drop-down menu.
Type of export
1. Based on callout details
This is based directly on either the historic callouts table (tblIncidentApplianceAssociation) or the turnout output table (tblMO_model). The output will contain all the columns in those tables, e.g. Assigned, Mobilised, InAttendance, Released, etc.
Note: If a model has been created using a route cost database which includes distances (see Setting up a Stored Route Costs Database) then the output will also include distances.
2. Based on attendance analysis
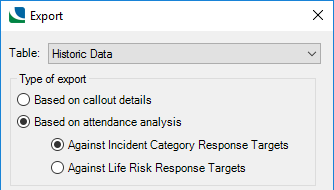
Against Incident Category Response Targets / Against Life Risk Response Targets
- The export is based on the results of an attendance analysis against response targets, i.e. it will contain the same columns as an overlay of Response Target Performance.
- Similar to Attendance Analysis, define whether Incident Category or Life Risk response targets should be used. The last-used option is used as default.
- The export, however, is for the whole of the data set and so there will be three values for BENCHMARK in export: PASS, FAIL and NA. The NA value denotes rows in the export for which there was no applicable performance target.
- Exporting attendance results requires an attendance analysis to be run as part of the export. The command will display an additional progress dialog for this before the export progress dialog is displayed.
Scope of export
Like Routecost calculation, this dialog provides the option to:
- Process the whole dataset (All callouts) or
- Apply currently set filters (Limit to callouts passing current filters).
Add spatial container(s)
Schema columns from other visible overlays can be selected as spatial containers.
These are applied as ‘FindContainer’ expressions on the data being exported so it will be possible to include columns in the export (for eg station ground, ward, postcode area, etc.)
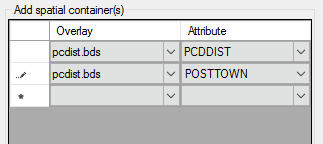
An export can be large running to tens of thousands of records. Each spatial container requires a ‘FindContainer’ expression to be evaluated.
The source of the spatial container can make a big difference to performance, e.g. using a shapefile (with .prj) of postcode districts (on an export of around 30,000 callouts) can be more than a magnitude slower than using the same data in a bds.
Therefore the command offers a Slow Export? ‘warning’ if spatial containers are selected from overlays that are not internal or based on bds files:
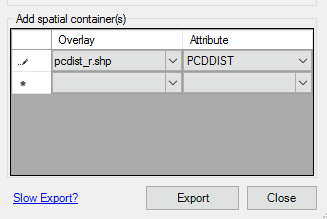
Clicking on Slow Export? displays this message
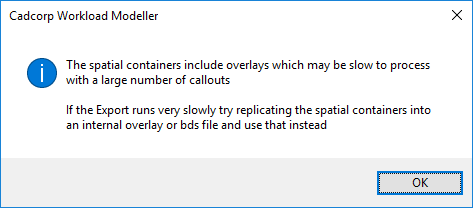
Click OK if acceptable.
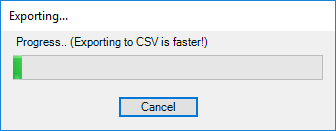
Click the Export button to begin exporting the data.
Data is exported by default to CSV files.
Workload Modeller supports export to: CSV, xlxs and xls files. However exporting to an Excel workbook (.xlxs or .xls) is considerably slower than exporting to a CSV text file by a factor of 10.
Callsign records contain four date/time fields:
- Assigned
- Mobilised
- In Attendance
- Released
The Workload Modeller Add-in requires all these fields to have values. If a record read from a data file is missing these values, it cannot be stored in the database.
However Workload Modeller Add-in can calculate default values where real data are missing.
To do this, click Data > Import > Options button in the Load Callout data file area of the Load incident data dialog, shown above.
Clicking the Options button will display the Load Callout Options dialog:
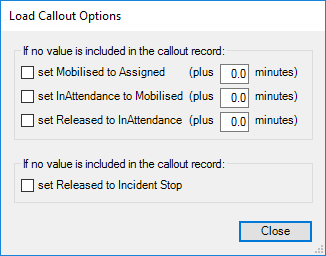
While loading Callout data, the loader can:
- Calculate a value for a missing field based on the previous field.
- Set missing ‘Released’ times to be the same as the Incident Stop time. (To do this, enable the set Released to Incident Stop tickbox.)
Points to remember:
- The Incident data must have been loaded prior to the Callout data;
- This method of substitution will make the data loading slower as each missing ‘Released’ time will require a database query to find the Incident Stop time.
- If an incident lasts for an extended period, e.g. days or weeks, then the resulting callout record would effectively define a very inflated period for the appliance being in use and this would skew modelling output.